Uptimeflare 可以通过 GitHub Actions 自动创建一个 KV 空间和 Cloudflare Pages,使用 Cloudflare 的节点来监控网站,还可以通过 Telegram 发通知。Repo 信息在下方卡片中。
lyc8503/UptimeFlare
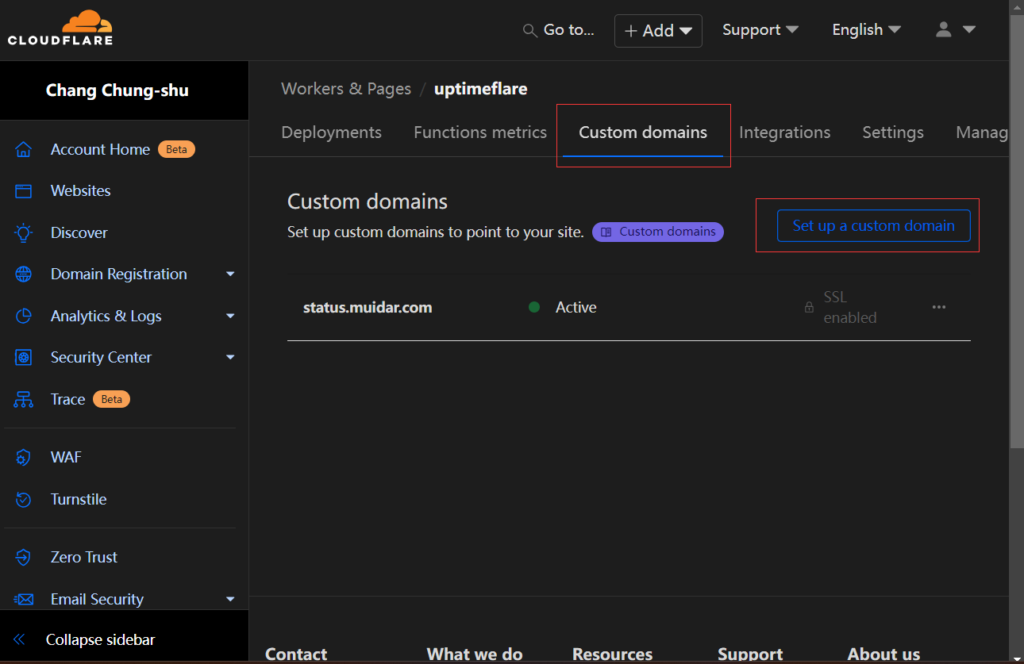
我的演示页面在此:https://status.muidar.com/
打开 GitHub 之后,点击 “Use this template” 按钮,并 “create a new repository”。
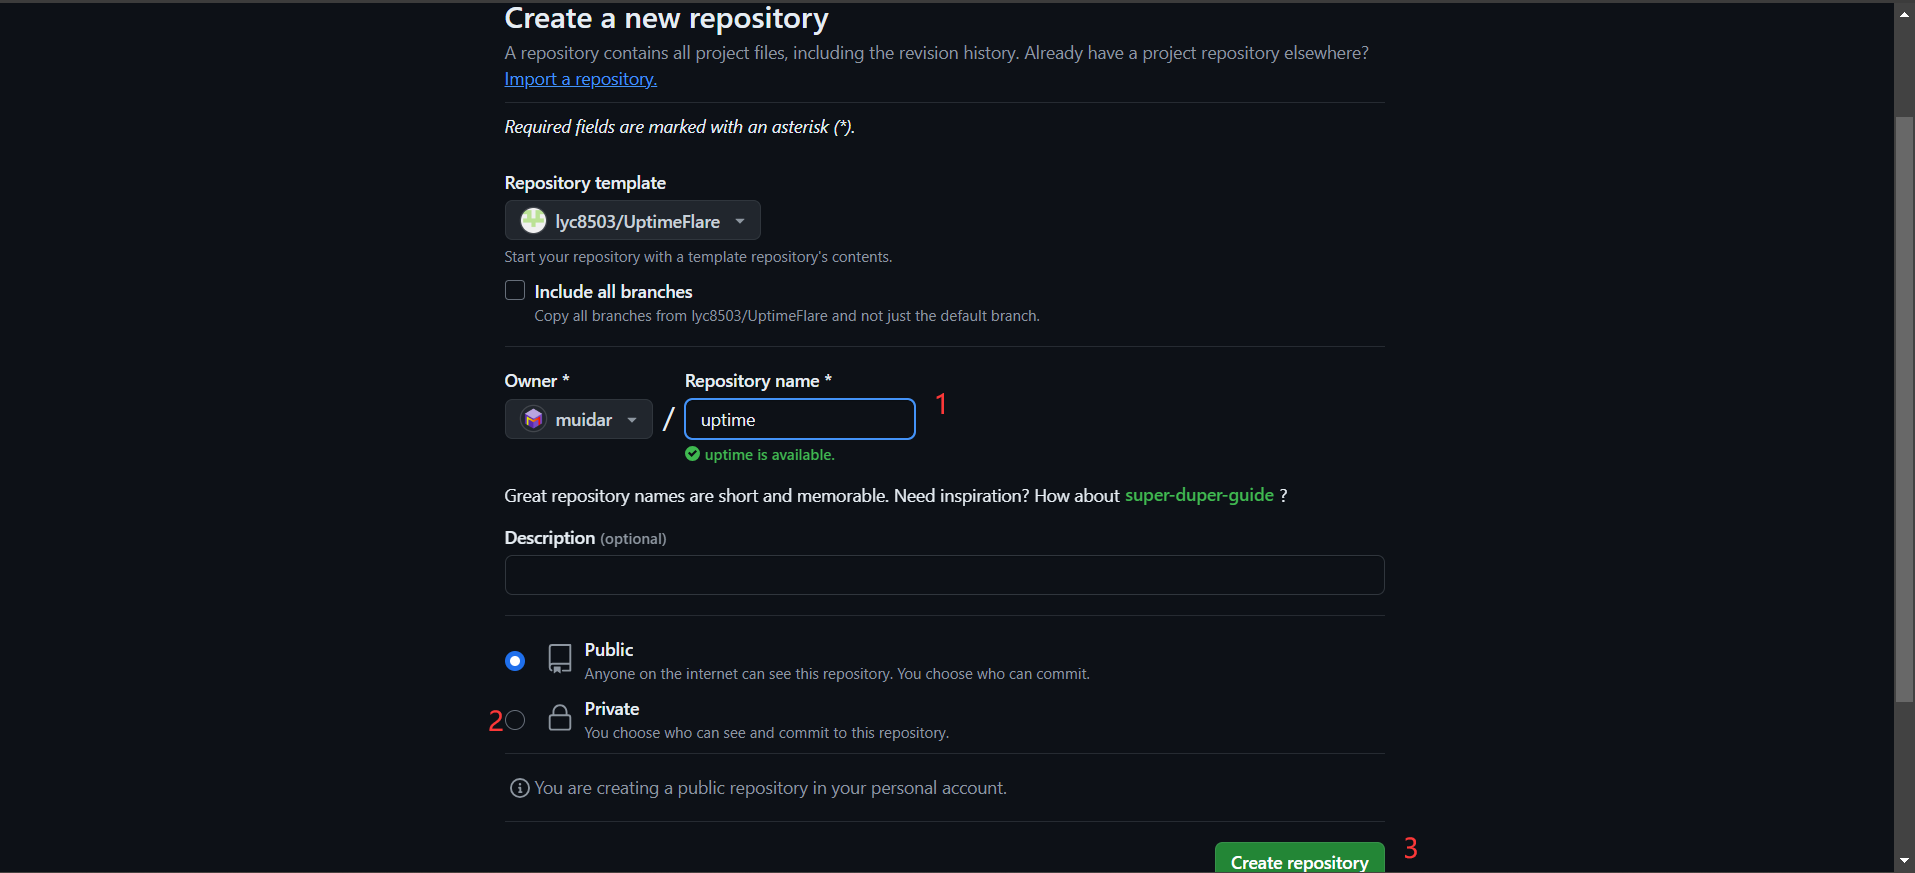
Repo name 随便填,不和你其它的 repo 重名就行了。
建议选择 Private,毕竟你不想让你的服务器 ip 公示于众,不是吗?
如果你仅仅监控网站那就无所谓了。
为了实现自动创建 Workers 和 KV 的功能,我们先得到 Cloudflare 用户 API 令牌 令牌这里创建一个 Token。
点击创建令牌后,选择 “编辑 Cloudflare Workers”。之后,账户资源、区域资源分别选择所有账户、所有区域即可。最后点击 “继续以显示摘要”,再点击 “创建令牌”,保存好 token,以免丢失。
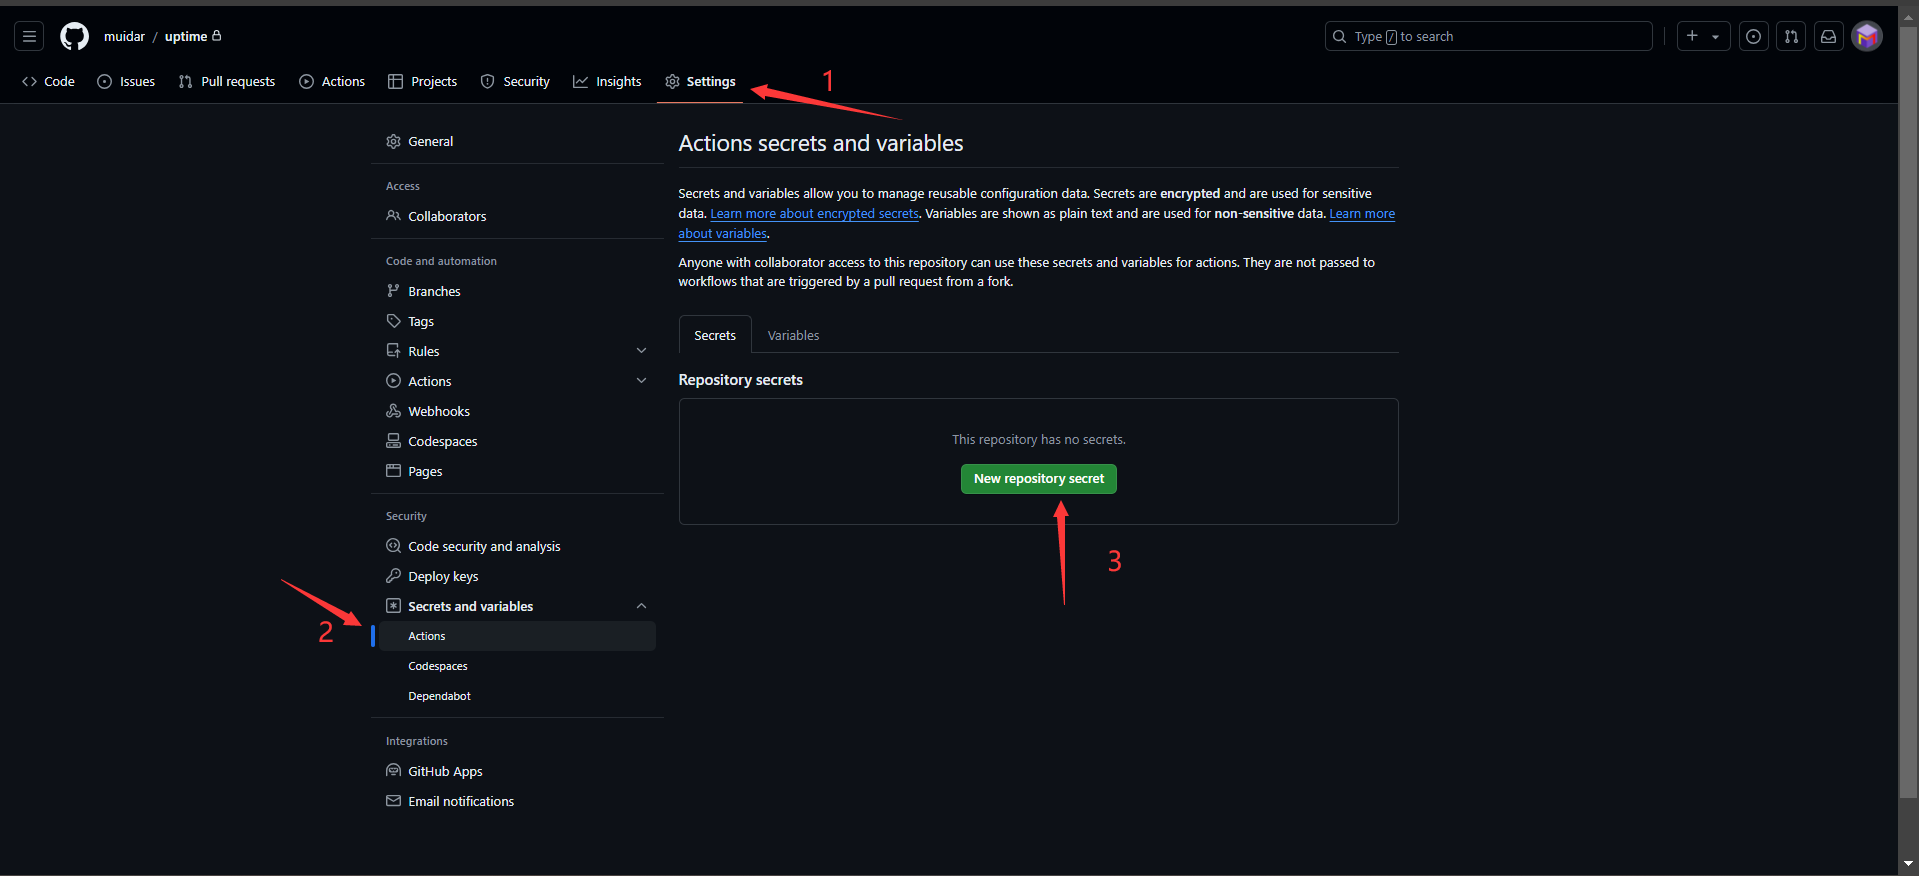
回到项目页面,打开 Settings>Secrets and variables>Actions,再点击新建 repo secret。
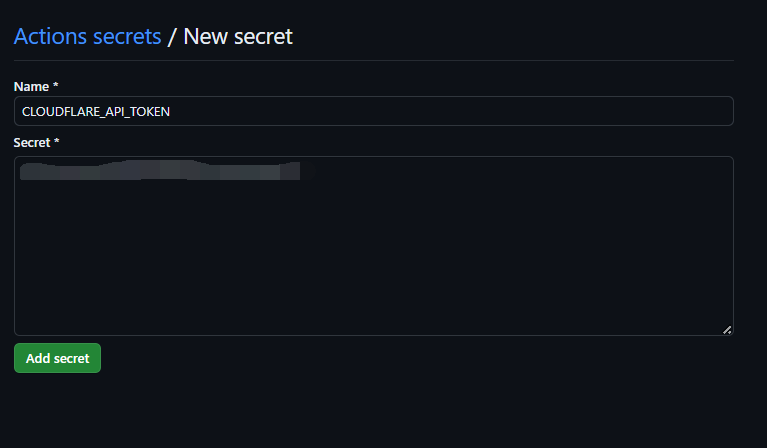
Name 填写 CLOUDFLARE_API_TOKEN,Secret 填写刚刚在 Cloudflare 创建的 API 令牌,然后点 “Add secret”。
我们需要通过修改 uptime.config.ts 来监控自己的网站。
HTTP 请求默认在 18-47 行,解释如下。
{
// `id` should be unique, history will be kept if the `id` remains constant
id: 'foo_monitor',
// `name` is used at status page and callback message 显示在状态上方的名称
name: 'My API Monitor',
// `method` should be a valid HTTP Method 可以是POST GET等
method: 'POST',
// `target` is a valid URL 网址
target: 'https://example.com',
// [OPTIONAL] `tooltip` is ONLY used at status page to show a tooltip 对于网站的描述
tooltip: 'This is a tooltip for this monitor',
// [OPTIONAL] `statusPageLink` is ONLY used for clickable link at status page
statusPageLink: 'https://example.com',
// [OPTIONAL] `expectedCodes` is an array of acceptable HTTP response codes, if not specified, default to 2xx
expectedCodes: [200],
// [OPTIONAL] `timeout` in millisecond, if not specified, default to 10000
timeout: 10000,
// [OPTIONAL] headers to be sent
headers: {
'User-Agent': 'Uptimeflare', // 设置用户代理,用于开防火墙
Authorization: 'Bearer YOUR_TOKEN_HERE', // 这一行可以注释掉,用于API验证
},
// [OPTIONAL] body to be sent
body: 'Hello, world!', // 这行可以注释掉,用于API
// [OPTIONAL] if specified, the response must contains the keyword to be considered as operational.
responseKeyword: 'success', //这行不用于API的话必须注释掉,不然无法正常使用
// [OPTIONAL] if specified, the check will run in your specified region,
// refer to docs https://github.com/lyc8503/UptimeFlare/wiki/Geo-specific-checks-setup before setting this value
checkLocationWorkerRoute: 'https://xxx.example.com', // 这个可以看文档,感觉用不上注释掉就行了
},
改完以后,我的长这样。
{
id: 'weblog',
name: 'My Weblog',
method: 'POST',
target: 'https://muidar.com',
tooltip: 'This is my weblog',
statusPageLink: 'https://muidar.com',
expectedCodes: [200],
timeout: 10000,
headers: {
'User-Agent': 'Uptimeflare 114514',
},
},
TCP_PING 的格式长这个样,在 50-59 行。
// Example TCP Monitor
{
id: 'test_tcp_monitor',
name: 'Example TCP Monitor',
// `method` should be `TCP_PING` for tcp monitors 必须填TCP_PING
method: 'TCP_PING',
// `target` should be `host:port` for tcp monitors 格式为IP:端口
target: '1.2.3.4:22',
tooltip: 'My production server SSH', // 标题
statusPageLink: 'https://example.com', // 标题跳转到的链接
timeout: 5000,
},
我的改完以后长这样。
{
id: 'tcp_SG',
name: 'Tencent SG',
// `method` should be `TCP_PING` for tcp monitors
method: 'TCP_PING',
// `target` should be `host:port` for tcp monitors
target: 'xx.xx.xx.xx:80',
tooltip: 'My Singapore Server',
statusPageLink: 'https://cloud.tencent.com',
timeout: 5000,
},
等你改好并保存以后,代码就会使用 Actions 自动在 Cloudflare 创建 Workers。打开在用户界面 > 左栏 > Workers & Pages,你会发现多了两个东西,一个是 uptimeflare 另一个是 uptimeflare_workers。
Uptimeflare 中下边会标注出提供访问的 pages.dev 地址。
如果想要自定义域名,可以点进去,找到 Custom domains,然后点击 “Set up a custom domain”,根据 Cloudflare 的指示,添加 CNAME 等待解析生效即可。