此文章非Pages教程,我打算从typecho迁移到hexo,但是之前因为文件丢过一次,导致整个博客彻底停更,就一直用的typecho,后来得群友启发,用GitHub Action自动打包推到Netlify,颇有成效,于是写篇文章出来
具体可看:runoneall/blog
创建仓库,名称随意,注意 .gitignore 选 Node
这里我直接用blog做仓库名
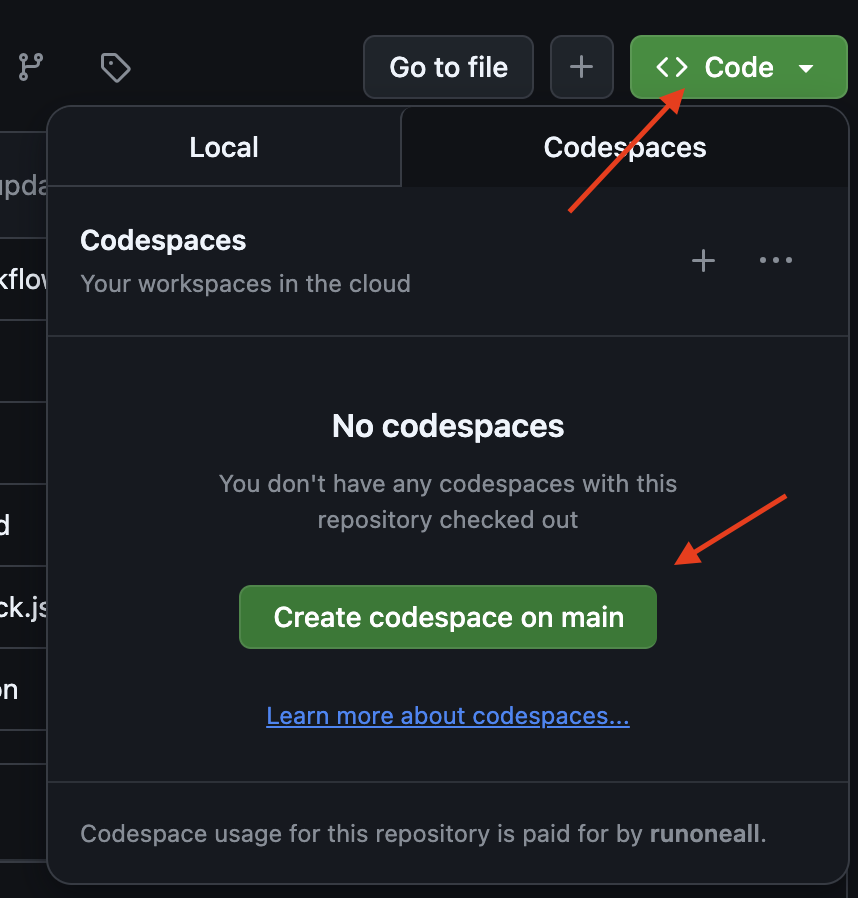
创建codespace
按照hexo官方教程搭建博客
这里文件夹我还是用 blog,npx hexo init blog
搭建好后创建workflow
name: Build And Deploy to Public Branch
on:
workflow_dispatch:
jobs:
build-and-deploy:
runs-on: ubuntu-latest
steps:
- name: Checkout repository
uses: actions/checkout@v4
with:
fetch-depth: 0
- name: Set up Node.js LTS
uses: actions/setup-node@main
with:
node-version: latest
- name: Install Hexo CLI
run: npm install hexo
- name: Install dependencies and generate
run: |
cd blog
npm install
npx hexo clean
npx hexo generate
- name: Deploy to public branch
uses: peaceiris/actions-gh-pages@v3
with:
github_token: ${{ secrets.REPO_TOKEN }}
publish_dir: ./blog/public
destination_dir: ./
publish_branch: public
keep_files: false
意思是:拉取代码 -> 安装nodejs -> 安装hexo -> 安装依赖并生成静态文件 -> 提交到public分支
(这里需要在仓库设置里创建名为REPO_TOKEN的secret,令牌需要对仓库有写入权限,勾选repo即可)
在netlify上创建项目,选择blog仓库,分支选public,点部署即可
这样一来只要GitHub不炸文件就丢不了